In this article, we will learn how to create a multilingual app with PowerApps step by step.
We’ll look at what PowerApps multilingual, what it’s used for in Power Apps, and how to use Power Apps Language Functions.
How to create multilingual apps in PowerApps?
Do you want to make your app more user-friendly by making it available in several languages? So let’s know the best ways to create multilingual PowerApps.
1: Create multilingual Power app using Microsoft Translator Connector
In PowerApps Microsoft Translator is a connector that used to display translated text on your app, so in this way, we will use it to create a multilingual app.
Microsoft Translator Syntax
MicrosoftTranslator.Translate(Source.Text, TargetLang.Selected.Value)
- The first step, add a Microsoft Translator connector to your app.

- Insert a drop-down list into your app.
- In the item property of the drop-down list if you want your app to support all language set this Formula
MicrosoftTranslator.Languages()
But if you want to add Specific language to your app, write this formula in the drop down list item property .
[“en”,”ar”,”fr”,”es”,”hi”]
Make sure you write the language correctly in order to Power Apps can identify the language the user will choose fro the drop down list.
- Create a global variable to catch the user language selected from the drop-down list for all the screens in your app.
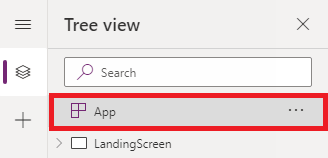
- From the tree view in the App section, select the OnStart property.
- Write this formula,
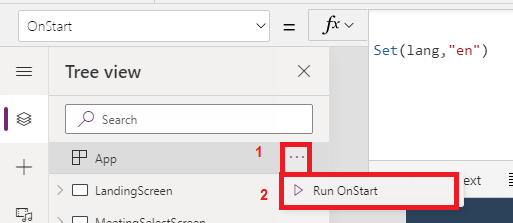
Set(lang,”en”)

lang is the Variable name and “en” is the English Language to start the Variable with. After you create the variable make sure to press Run OnStart.
- In the OnChange property of the drop-down list write this formula,
Set(lang,LanguageDropdown.Selected.Value)
- The last step is to apply the translation for every text written in the Screens of your apps.
For example in the text property, instead of the text wrote this formula,
MicrosoftTranslator.Translate(“Book for an existing meeting”,lang)
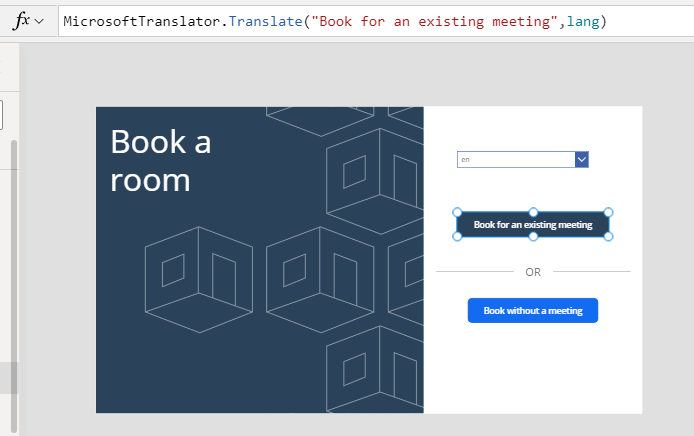
Finish all the controls in your app and now the app user can choose his preferred language of the app by changing the Dropdown list value.
This is the first method to Build a multi-language app in PowerApps using Microsoft Translator.
2: Create multilingual Power app using resource file “Localization”
In this method you will do the following:
- Create an excel file with three columns for ( languages, key “controls Ids”, Value “the text of the control”) for all strings in your app.

You can use any storage to store the data in the resource file , beside the excel file you can use SharePoint , Dataverse or any storage that yo can use in Power Apps.
- upload the excel file somewhere ( One Drive, SharePoint list, or static to your app).
- Insert Dropdown list and fill it with the languages from the excel file
Distinct( Table2,language)
Use Power Apps distinct function to select only distinct languages from the Excel .
Table2 is the excel table that contain the data for language and the texts translation.
language is the excel column that contain the language that the user will translate the app to.
- In the OnChange property of the drop-down list set this formula where lang is the global variable:
Set(lang,LanguageDropdown.SelectedText.Value)
- In your PowerApps app, Use a Lookup to the Excel item based on the key of the control to get the translation.
LookUp(Table2,Key=”ButtonMeeting” And languague=lang,Value)
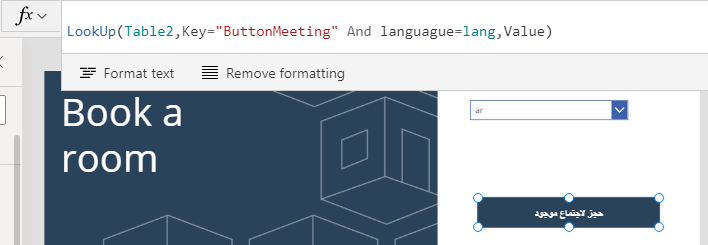
Apply this step for all the controls in the app , and enjoy your multilingual Power Apps app.
3: Building multilingual apps in PowerApps using component.
This method will help you learn how to create a multi-language app with localized experience using Canvas app Component. You can find everything in detail in the Documentation. Here we will list the steps in general.
- Create component library
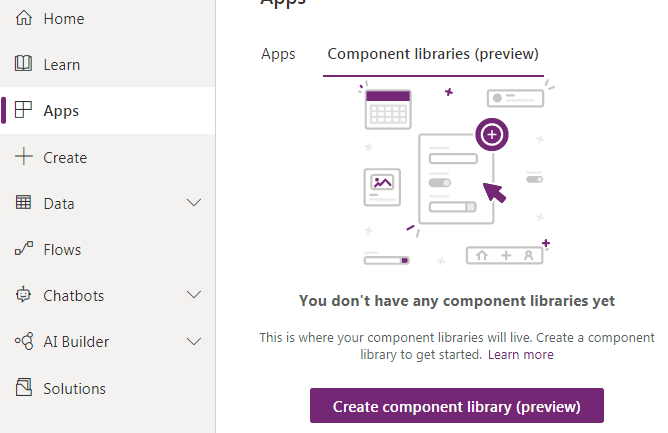
- Create a custom property for the language that considers the input property that will receive the current locale ID for the current user.
- Create a custom property for the output that exposes the translated labels based on the input property.
- In The OnReset property use Set() function to create a table with the labels in different languages as a dictionary.
- In the output property writes a formula to find the right translation entry based on the input Language.
- Save and publish the component library and then use it inside your app.
this method is in the preview, and you will find how to build multilingual apps in PowerApps using component in details in the Documentation
Conclusion
There are many ways that can help you build a multilingual app. You can use localization in powerapps, Microsoft Translator, or even the traditional way “resource file” to Build a multi-language app, also you can use the Powerapps Language function to return the language, script tag of the current user and you can use this information to translate your app and build multilingual apps in powerapps.
See Also
- What is Microsoft Power Apps?
- Sign Up and use Power Apps
- PowerApps Canvas App Vs Model-driven App Vs Portal App.
- What Is Microsoft Dataverse?
- Connectors in a Power Apps.
- Customize SharePoint Form With PowerApps
- How To Create A Power Apps Custom Connector?
- How To Create Power Apps DataFlows?
- How To Overcome Power Apps Delegation Limit?
- Learn Power Apps – Free Course.
