Recently Microsoft applied the modern design for Power Automate on all regions as the default designer, so in this Post we will learn about the new features of Power Automate Modern Design.
new power automate designer
- The new Cloud Flows designer is faster, easy to use and worked with Copilot.
- The actions are smaller than in the classic design that will enable you handling complex flows design.
- I the modern design you have the ability to search for dynamic content in expression editor.
- Better Run After Settings that allow you to express more business logic in the flow.
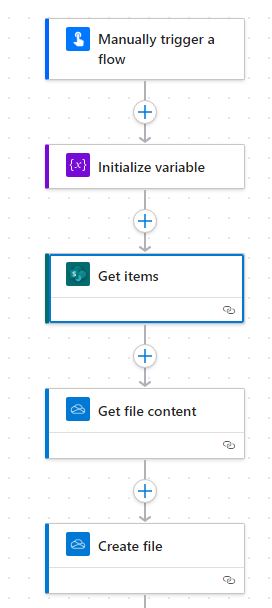
Switch back to the classic power automate designer
Now the modern design is the default designer for Power Automate flows, but you can switch back to the classic design and use it for your flows.
From the more commands … select switch to classic designer or enable the toggle for the new designer.

Trigger settings in Power Automate modern designer
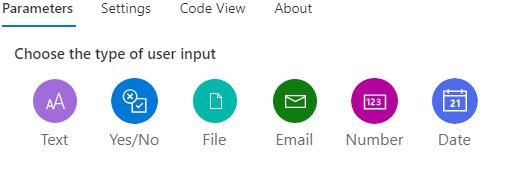
When you add a trigger to your flow, you can add-edit-delete the input parameters by clicking on the trigger and it will open a Panel on the left of the page , Click +Add an input that will enable you to add text, numbers, files, dates,.. parameters to your flow.

Add Actions to your flow
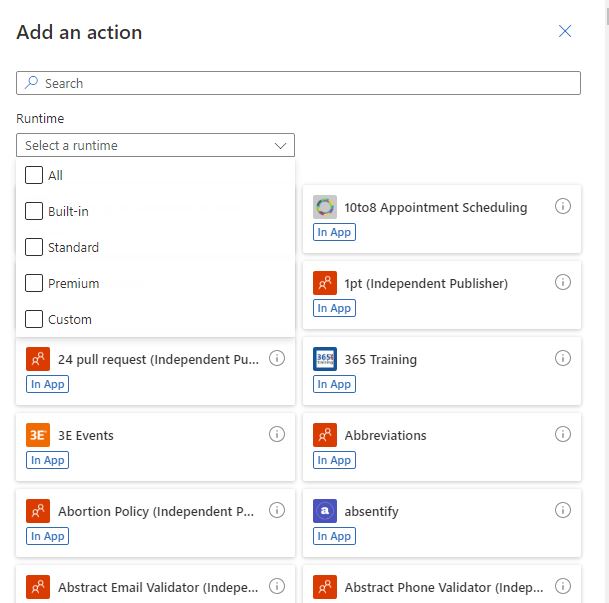
You can click the + icon and then choose add action to add more actions to your flow.
after you click add an action the left Panel will appear with all the actions that you can add to your flow , you can filter by the connector type or you can search by keywords for your action.
When you search for and add you action to the flow , you can set the parameters of your action, enable and disable static test, sww the code of your action,….
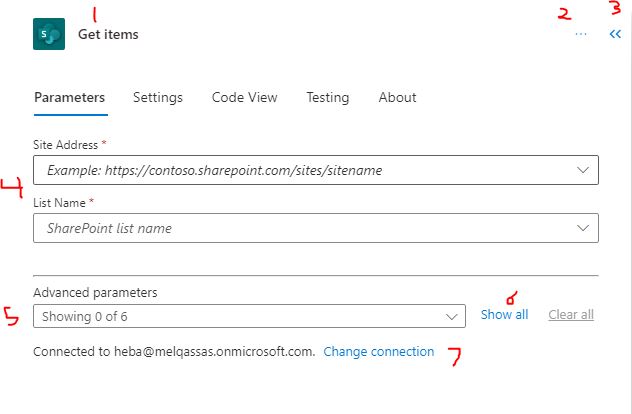
- To rename the action by clicking on the action name and type the new action name that you want to set.
- To add notes or delete the action/ step
- To minimize the action panel
- Settings of your Action
- All Parameters that you can add to your action, you can choose from them, for example in the create item it will contain all the fields that you will add.
- You can add or change your action connection
Delete action in the new designer
You can copy and past actions in the new designer.
Copy an action: Right click on the action you want to copy then press Copy Action

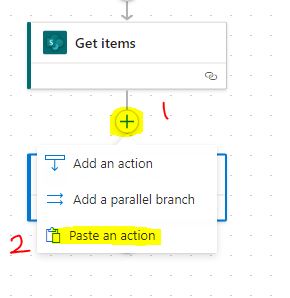
Past an action: click in the + icon to add the action and then choose Paste an action
Delete action in new power automate designer
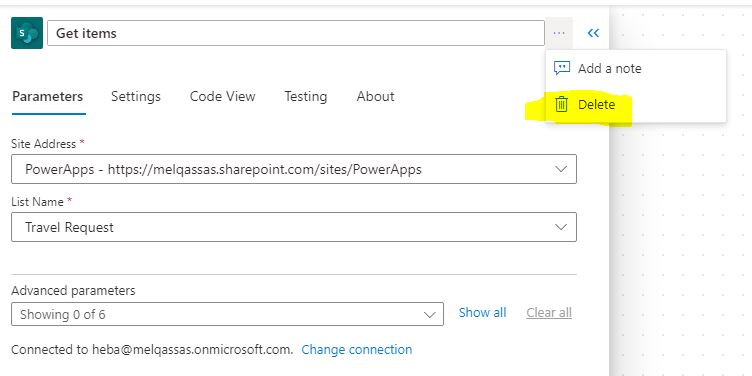
To delete an action in the new designer follow these steps
- Select the action that you want to delete and it will appear in the left panel
- From the more command select delete
Disable an action or set static (mock) outputs for an action
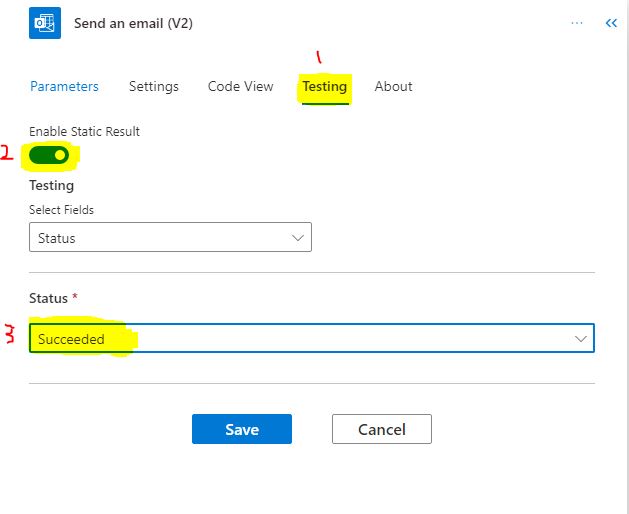
You can disable an action in the new Power Automate designer instead of removing it .
Navigate to Testing tab of the action and enable ‘Static Outputs’ and set it to 200 Succeeded. This essentially treats the action as successful without actually running the action.
Run after in the new designer
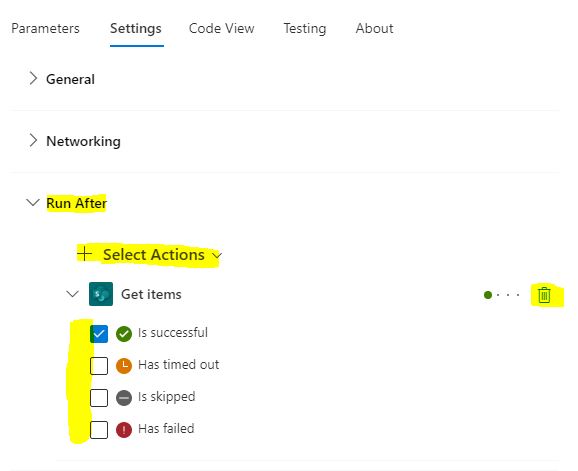
In the new Power Automate designer you can set an action to run after multiple actions with different status,
Select the action that you want execute after another action , in the Settings property navigate to the Run After option and add the actions that you want to run your action after, and select one or more status of Is successful, has timed out, is skipped and has failed
The Run After an action is succeed represent with continuous line as shown in the picture below in no 1, and the others represented with the dashed line. and a circle is created with a color based on the action status that you choose as represented in no 3.

Zoom buttons
You can Zoom in and out your flow or fit view as shown in the bello image

Drop zones
The canvas contains AI-powered designer drop zones to help you easily drag cloud flow actions. The drop zones are indicated by blue dashed lines and the not allowed zones indicated by gray lines.

See Also
- OData Filter Query Power Automate In SharePoint Get Items |
- How Power Automate Create Excel Table Dynamically? | Power Automate
- How To Make A Csv File Utf-8 Encoded? | Power Automate
- How Power Automate Create Excel Table Dynamically?
- How To Format Text In PowerApps? PowerApps Convert Text To Other Data Types
- Alternate Row Color In Gallery PowerApps: Simplest Way
- Check If PowerApps Contains Substring
- PowerApps Get Day Of Week Date
Join us
- Subscribe to Power Platform Geeks YouTube channel.
- Register to Saudi Arabia Power Platform User Group.




I was recommended this website by my cousin I am not sure whether this post is written by him as nobody else know such detailed about my difficulty You are wonderful Thanks