In this blog post, we will learn how to work with pdf function in PowerApps.
There are many custom solutions to generate PDFs within PowerApps using various techniques such as HTML to PDF Conversion that generate an HTML representation of the content you want in the PDF within PowerApps, and then convert that HTML to a PDF, but many of these approaches require might require some level of technical expertise. So in this post we will introduce a simple function to generate Pdf documents in PowerApps.
What is PDF function in PowerApps?
- The PowerApps PDF function till the date of this post is an experimental feature that isn’t meant for production use and may have restricted functionality.
- Pdf Function used to generate a PDF document from the contents of a screen or certain types of controls inside your app.
- You can Download the generated document or send in an email or send to a flow “You can pass the generated file to an action connector”
Enable Power Apps PDF function
As we said it is an experimental feature that available for use before an official release, so in order to enable the function follow theses steps:
- Open the app you want to use the PDF function
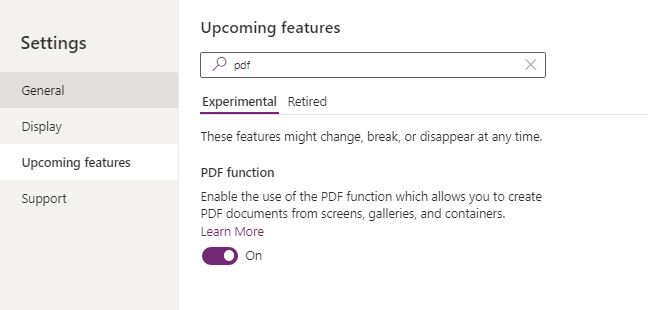
- Select Settings and then select Upcoming features.
- You will find it on the Experimental tab, turn on PDF function. now you can use the pdf function inside your screen.
Limitations of Power Apps PDF function
- You can only generate a PDF from content existing on the screen where you have invoked the PDF function.
- There are some controls that aren’t currently supported include charts, Power BI tile, Map, and some configurations of third-party PCF controls.
- Nested Galleries aren’t supported.
- Nested Galleries aren’t supported.
Syntax:
PDF (ScreenName or controlName [,{Size, DPI, Margin, Orientation, ExpandContainers}])- ScreenName or controlName – Required , the content to use to generate the PDF.
- Size: Optional. the dimensions of the generated PDF, A4, A6,A1,letter,Creditcard ,….etc
- DPI: Optional. (value greater than 0) the scaling/resolution of the generated PDF (default is 96)
- Margin: Optional. The size of the space between the content and the outer edge of the generated PDF (The default value is 0.5 inch (12.7 mm) for all margins).
- Orientation: Optional. a portrait (vertical) or landscape (horizontal) orientation
- ExpandContainers: Optional. Boolean. Controls whether certain containers with contents that exceed their allocated size expand to display all content in the generated PDF.
Enable PDf function
- Click the App setting .
- In the upcoming feature search for pdf and enable the pdf function.
PowerApps PDF function examples
- Generate PDF document of a selected screen
PDF('Your Screen Name')this will create a pdf document from the visible contents of Screen
You can view the pdf object on PDf viewer or send to an email or a flow ,…etc.
Set(varpdf, PDF('Home Screen'));Navigate(screen1)This will display the PDF object in the pdf viewer placed on screen1, it display only the visible content of the screen. and not expanded the controls.
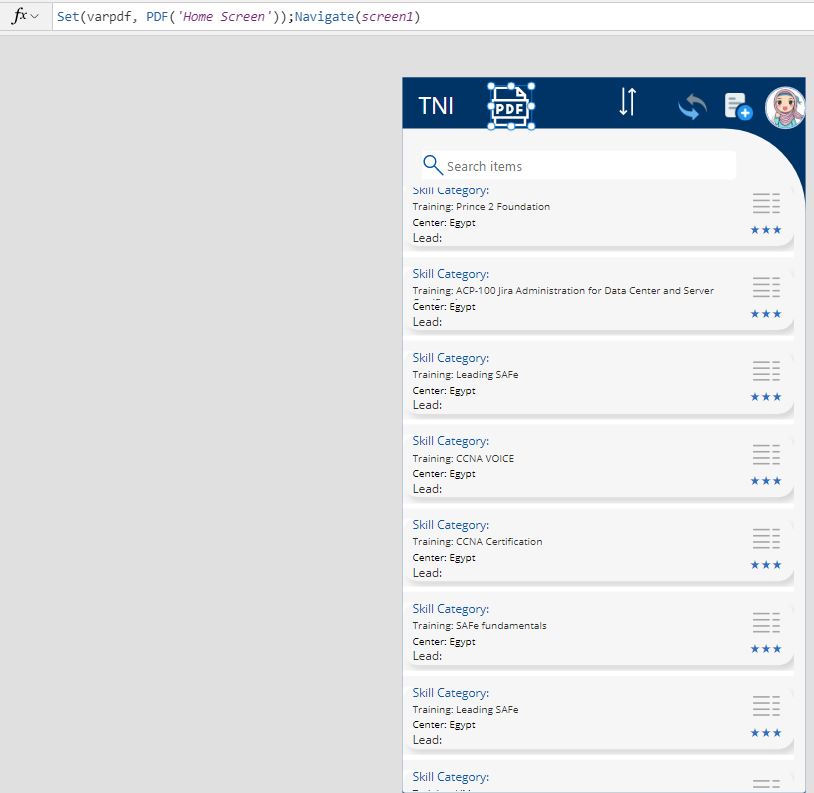
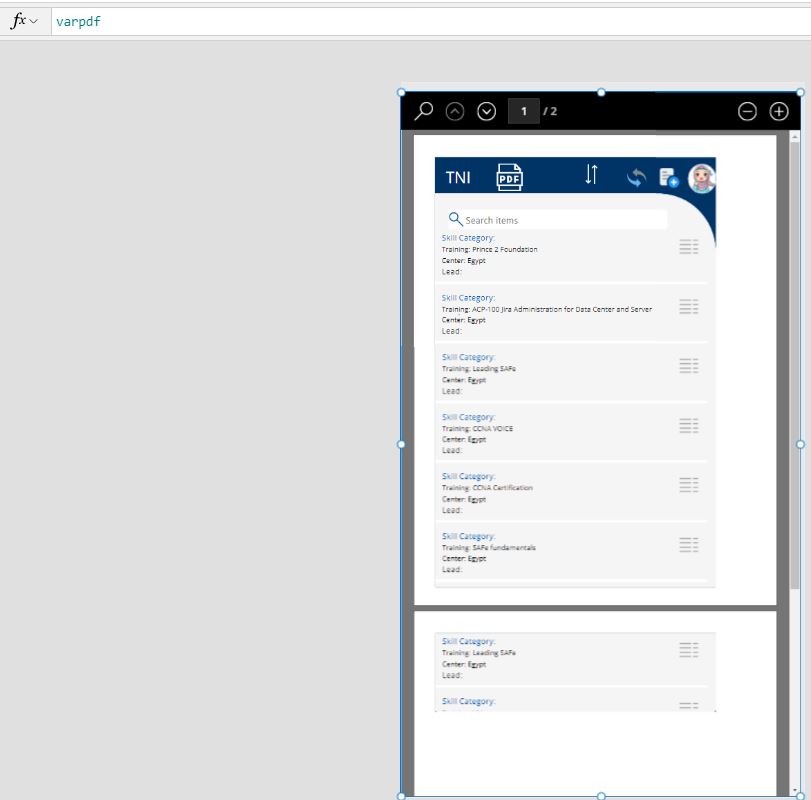
You can use the {ExpandContainers: true} property to expand the data in the controls “in the gallery” displayed in your screen
Set(varpdf, PDF('Home Screen',{ExpandContainers: true}));Navigate(screen1)This will generate pdf document containg all the items displayed on the gallery.
- Generate PDF document from a form control on the current screen
You can generate a pdf document for a form either display or edit form in PowerApps
Set(varpdf, PDF(EditForm1,{ExpandContainers: true}));Navigate(screen1)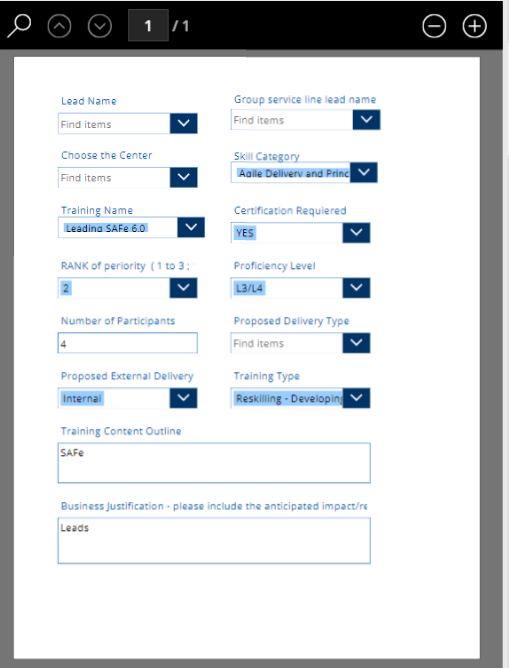
Sending the exported PDF document in an email message
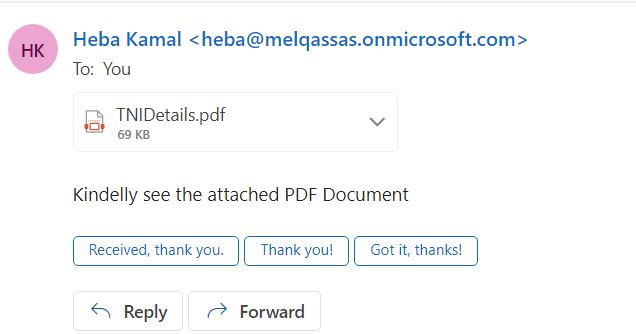
You can send the generated pdf document from PowerApps as attached document to the user email using the Office365Outlook connector as shown in the below formula.
Office365Outlook.SendEmailV2(
    "Hebakamal87@outlook.com",
    "TNI PDF",
    "Kindelly see the attached PDF Document",
    {
        From: User().Email,
        Attachments: Table(
            {
                ContentBytes: PDF(
                    EditForm1,
                    {
                        Orientation: PaperOrientation.Landscape,
                        Size: PaperSize.A4,
                        ExpandContainers: true
                    }
                ),
                Name: "TNIDetails.pdf"
            }
        )
    }
)
In your mail you will find the attached file that you generated from the pdf function in PowerApps
Generate PDF from gallery Contain nested galleries
One of the PDF function limitation is the nested galleries, but you can work around this limitation by generating HTML table that contain the main gallery and the sub galleries inside it and you can generate the pdf using Power Automate.
Concatenate(
    "<table border='1'><thead><tr>",
    "<th>Header1</th>",
    "<th>Header2</th>",
    "</tr></thead><tbody>",
    Concatenate(
        ForAll(
            Gallery2.AllItems, /* Iterate through the outer gallery items */
            Concatenate(
                "<tr>",
                "<td>", ThisRecord.title, "</td>",

                "</tr>",
                /* Nested gallery data */
                Concat(
                    ForAll(
                        ThisRecord.Gallery4.AllItems, /* Iterate through the inner gallery items */
                        Concatenate(
                            "<tr>",
                            "<td>", ThisRecord.'Skill Category'.Value, "</td>",

                            "</tr>"
                        )
                    ),""
                )
            )
        )
    ),
    "</tbody></table>"
)
Conclusion
The PDF function in PowerApps allows you to generate PDF documents from the data within your PowerApps application. You can create PDFs from forms, galleries, or other controls, making it easier to capture and share structured data.
See Also
- How To Export Power Apps To Excel File? | Power Automate
- How Power Automate Create Excel Table Dynamically? | Power Automate
- How To Make A Csv File Utf-8 Encoded? | Power Automate
- How To Format Text In PowerApps? PowerApps Convert Text To Other Data Types
- Alternate Row Color In Gallery PowerApps: Simplest Way
- Check If PowerApps Contains Substring
- PowerApps If Statement And Nested If With Example
- Environment Variable In Power Platform With Examples
- Model Driven App With SharePoint Data Source
- PowerApps Get Day Of Week Date
Join us
- Subscribe to Power Platform Geeks.
