One of the key features of Power BI is the ability to filter and sort data to identify trends and patterns. One common requirement in data analysis is to find the top or bottom results based on a specific metric.

In this post, we will explore different ways to get the top 10 in Power BI. Whether you are a beginner or an advanced user of Power BI, these techniques will help you gain valuable insights from your data.
Different ways to get the top 10 in Power BI
When working with large datasets in Power BI, it’s often useful to focus on the top results to gain insights into the data. Fortunately, Power BI provides various methods to get the top 10 results based on specific measures, including using the “Top N” filter, the “RankX” function, and the “Visual-Level Filters” option.
Each of these methods has its own benefits and use cases, and choosing the right one can depend on the specific needs of your analysis.
In this post, we will explore each of the below methods in detail to get Top 10 in Power BI and provide examples to help you understand how to implement them effectively in your Power BI reports.
- Top N Filter.
- Top N in DAX.
- Ranking in DAX.
- KEEP TOP Filter in Power Query.
Download the PBIX file (4 Ways to get Top 10 in Power BI)
1) How to use Top N Filter to get Top 10 in Power BI?
Suppose you have a products report that shows the amount for each product category.
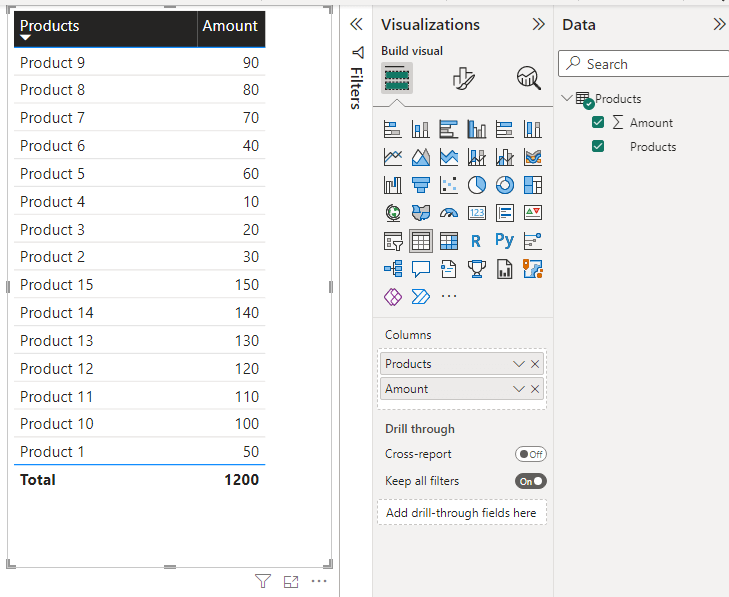
To get the top 10 products based on product amount, you can follow these steps:
Steps
- Click on the sales amount table visual to select it.
- Go to the Visualizations pane and expand the Filters section.
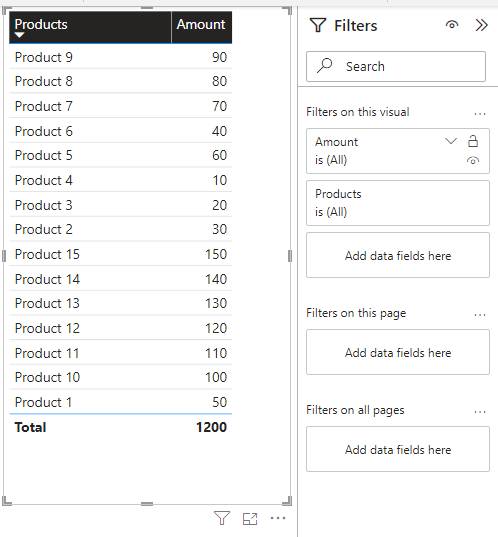
- Click on the arrow besides the field that you need to filter, in our case, it’s “Products“.
- At “Filter type“, select “Top N” filter option.
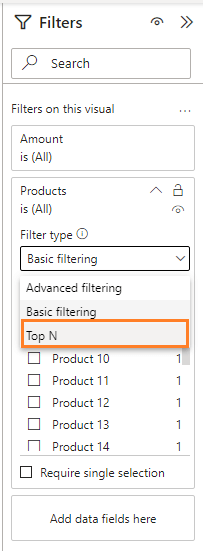
- Select “Top” or “Bottom“, and Enter 10 as the value for the Top N filter.
- From “Data” pane, drag the “Amount” column at the “By value” section.
- Finally Click on “Apply filter“.
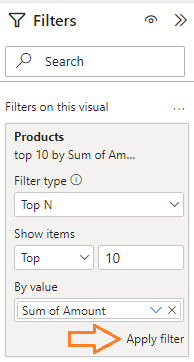
- Great, the top 10 results is now shown successfully.
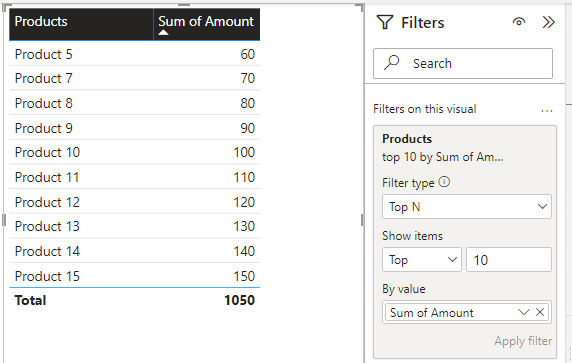
This is one of the easiest and most commonly used ways to get the top 10 values in Power BI using Top N filter.
2) How to use Top N in DAX to get Top 10 in Power BI?
Besides the TOPN filter option, you can also use TOPN function in DAX to get Top 10 in Power BI by doing the following:
Steps
- Click on “Data” section, then click on a table to create a new table based on DAX function in Power BI.
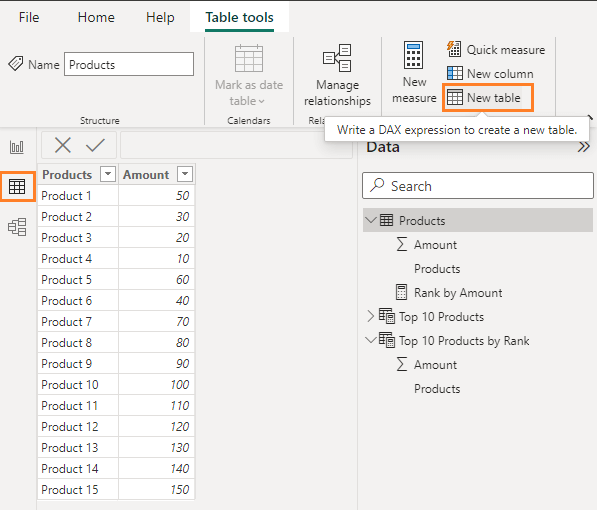
- Write the below formula to filter only the top 10 rows based on the “[Amount]” field in the “Products” table order by descending.
Top 10 Products = TOPN(10, Products,Products[Amount],1)You can set the 10 value to any number as you need, and the last option is used to order by (1 for Descending, and 0 for Ascending).
Read also, Top N Vs RANKX in Power BI DAX
- Great, the result has been filtered successfully to show only the top 10 rows as shown below.
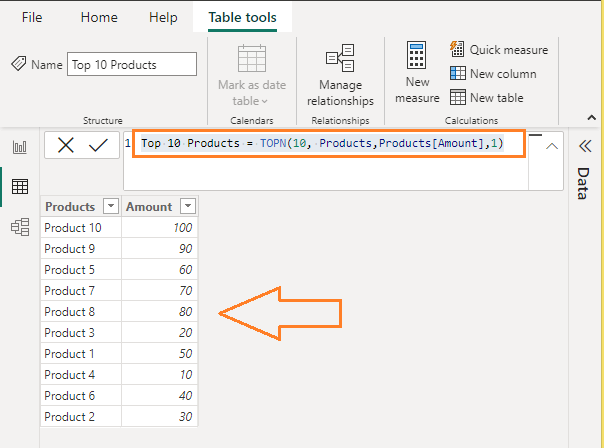
3) How to use RANX function in DAX to get Top 10 in Power BI?
One way to obtain the Top 10 rows in Power BI is by utilizing the “RANKX” DAX function. This function assigns a rank to each product according to the sales amount, and the steps to implement this method are outlined below:
Steps
- In your table, create a new calculated column.

- Write the below formula based on your table and column
Amount Rank = RANKX(ALL('Products'),'Products'[Amount])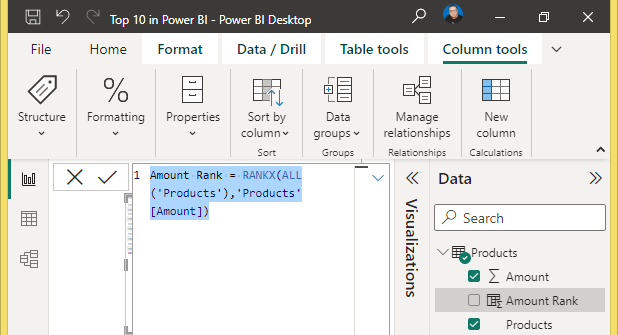
You might also like to read RANKX Syntax and Top N Vs RANKX in Power BI DAX
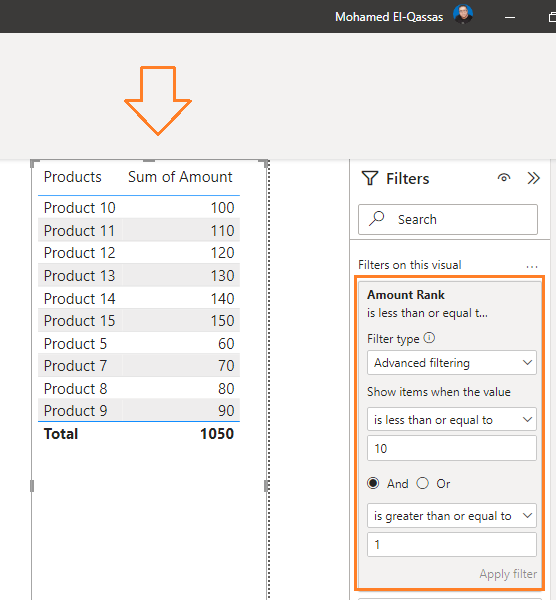
- Click on your visual, then In “Filter” Pane, add the newly created column as a filter field.
- Select “Advanced Filter” and set it as shown below.
- Finally, click on “Apply filter“, you will note that the result has been filtered to only show the TOP 10.
4) How to use Power Query to Get Top 10 in Power BI?
One way to obtain the Top 10 rows in Power BI is by using Power Query as outlined below:
Steps
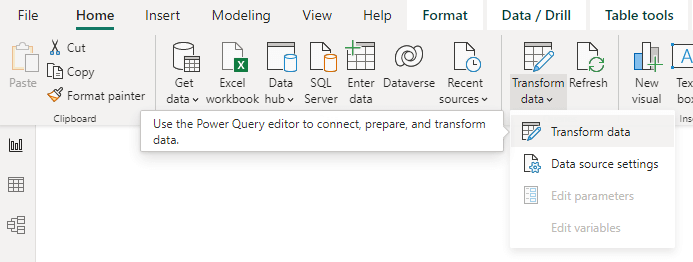
- Load your data into Power Query editor by selecting “Transform data” from the Home tab.
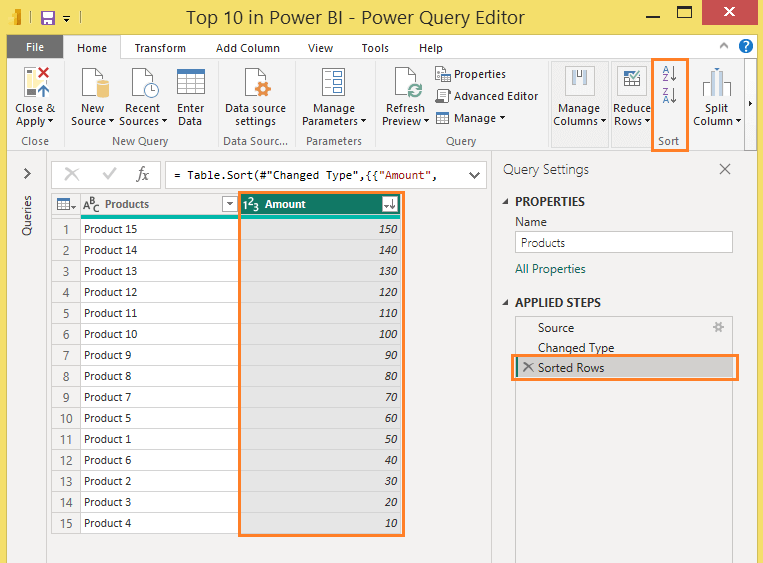
- In the Power Query editor, select the column you want to sort by.
- From the “Transform” tab, select “Sort Ascending” or “Sort Descending” depending on how you want to sort the data.
- From the “Transform” tab, select “Keep Rows” and then select “Keep Top Rows“.
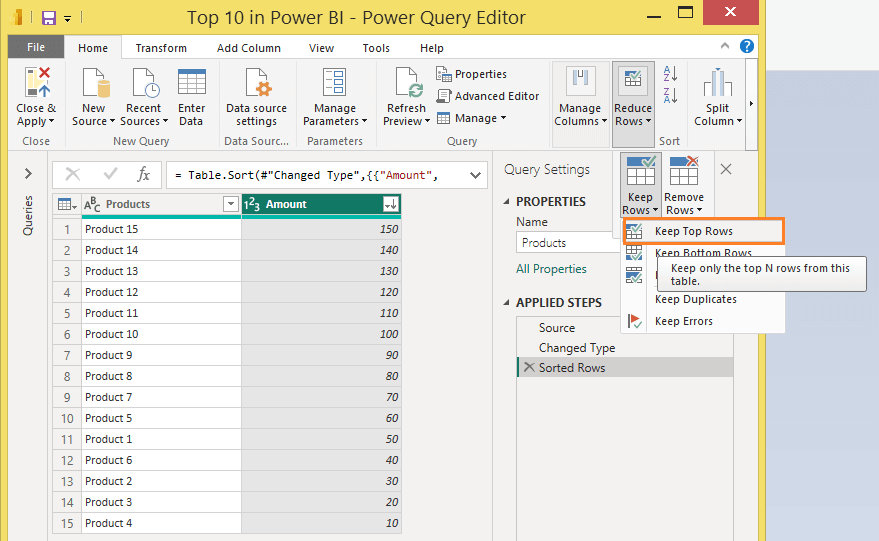
- In the dialog box, enter the number 10 to indicate that you want to keep the top 10 rows.
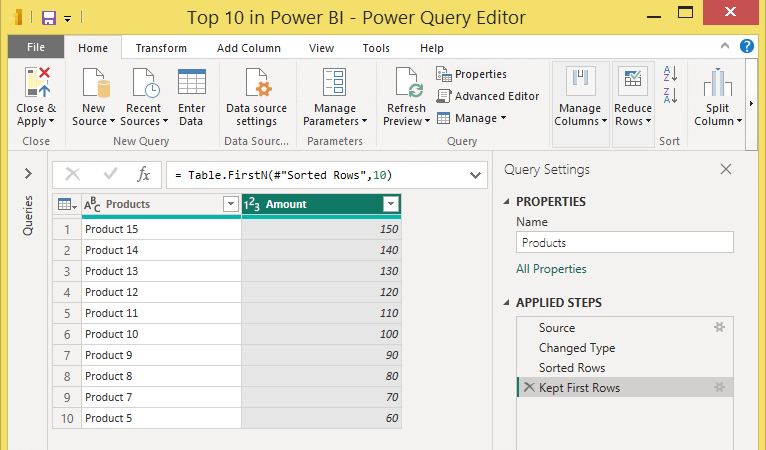
- Click OK to apply the changes.

- Once you have completed these steps, you should see only the top 10 rows of data in your Power Query editor.
Download
You can download the PBIX file with 4 Ways to get Top 10 in Power BI, and don’t forget to follow Power BI Repo to get more PIBX files samples with complex DAX formulas.
Conclusion
In conclusion, getting the top 10 results in Power BI is a common task for data analysis and reporting. There are multiple ways to achieve this, including using the Top N filter, Top N function in DAX, or RANKX function in DAX. Each method has its own advantages and can be applied in different scenarios based on specific needs.
By understanding these methods, users can easily obtain the top 10 results in their Power BI reports and make data-driven decisions.
