In this article, we’re gonna learn what are PowerApps connectors? and how to create a PowerApps custom connector?
What are the connectors in PowerApps?
Power Apps allow you to easily integrate with other applications or services by means of connectors. the connector is considered as a bridge between the data source and the user interface.
You need connectors to connect to your data sources to bring the data to your applications. this data can be in two forms.
- Tables of data, when it returns tables of data you just add the data source to your app and select the table you want to interact with within your app.
- Actions, if your connector returns a set of actions, you will add your data source in your app and then point your control manually to action by using the formula in the items property.
PowerApps Connectors
There are two types of connectors provided by Power Apps. these connectors are
- Public (Built-in) Connectors, and
- Custom connectors.
1) Public Connectors
They’re also known as “built-in connectors” and are categorized into “standard” and “premium” connectors.
- There are 600+ connectors that make it easy for application builders to connect to both Microsoft and third-party services, from Dynamics 365 to Dropbox.
- PowerApps provide many connectors that you can use to connect to your data source. For example, if you want to connect to SharePoint, you have to use its connection “SharePoint connection” and so on.

You will find connectors for many popular services and on-premises data sources, including SharePoint, SQL Server, Office 365, Salesforce, Twitter, etc. For more details about connections and data sources, please check out this video.
2) PowerApps Custom Connectors
There are currently over 600 connectors for Power Automate and Power Power Apps that allow us to interact with other web services. What if the connector you want to use does not exist? you can create your’s, Custom connectors make it possible to create our own connectors for any web service that has a REST API.
- PowerApps custom connectors can be configured to allow the use of APIs that aren’t covered by the public connectors.
- PowerApps custom connectors provide a way to extend apps by calling APIs, services, and systems for scenarios tailored toward your business needs.
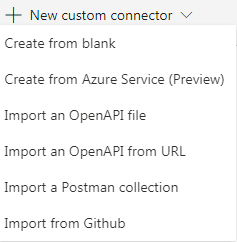
Custom Connectors In Power Apps
So let’s go deeper to understand the PowerApps custom connectors and how to create a custom connector.
Characteristics of PowerApps Custom Connectors
First, we have to know that the Custom connectors are scoped to individual environments, this means that they are configured in the context of one environment and must be added to each environment to use them, so they are only available to apps and flows within that environment.
- Custom connectors are configured to allow the use of APIs that aren’t covered by the public connectors.
- Custom connectors can be shared so that others in your organization can start consuming custom connectors.
- When exporting apps from the source environment to the target environment, you have to review the connectors that are used. And if you are using custom connectors, then they will need to be re-created prior to being imported into the target environment or must be included in the CDS solution.
- Custom connectors can have one or more actions.
How to create a PowerApps custom connector from API?
In this demo, we’ll learn how to create a PowerApps custom connector from API by importing an Open API from URL.
Create a custom connector from API step by step
- Open Power Apps Maker site.
- Select “Data“, choose “Custom Connector“.
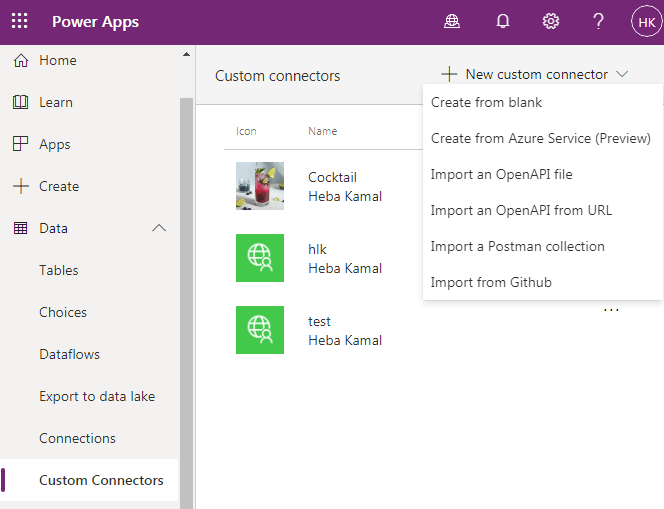
- Then click “New custom connector” and choose the type of your custom connector.
You can create a custom connector from blank, or create from azure, or if you have your API file you can create a custom connector from it, or create a custom connector if you have a URL for your API “import an OpenAPI from URL “, or create from postman collection or import from GitHub.
- I will use one of the Open API s,” the cocktail database“, so the next step is to set the connector name and the URL for the API that you will use, Then click “Import“, and
- Finally, click on the Continue button.

This will redirect you to a page to fill the components of building custom connector ”connector information such as its icon and the host of the API” and the security-in which you will Secure your API and the definition in which you describe the API and define the custom connector, and testing the connector.

- In the “General” tab, set the Connector information such as
- Connector Icon (an icon related to the connector you will create),
- Icon background color (if you want to put background color behind the icon or do nothing if you want the icon to be transparent),
- Description. (as you prefer)
- Schema: HTTPS or HTTP call. In my case, I’ll use HTTPS.
- The host >> here you will write the API host. In my case, it will be www.thecocktaildb.com
- The base URL for the API.
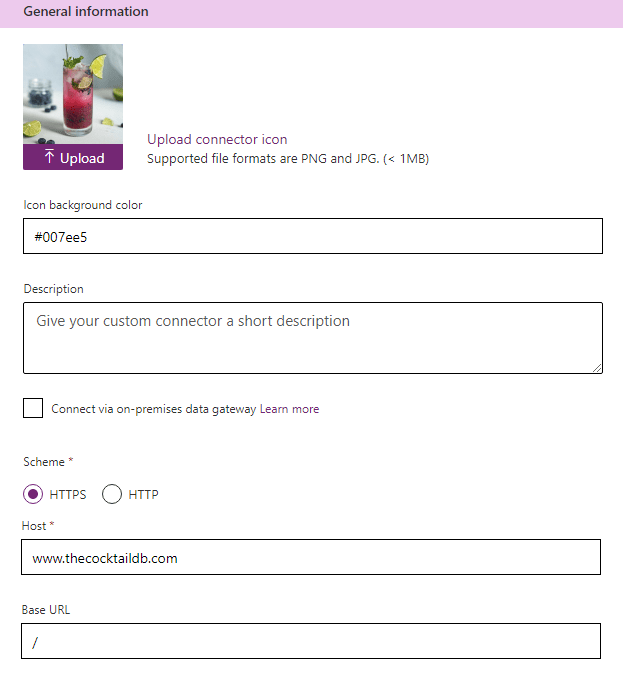
Note: The connector uses the API host and the base URL to determine how to call the API.
- Then in the Security of the custom connector. There are several options available for Authentication in custom connectors,
- Here, we will have basic authentication for options “No authentication, Basic authentication, API key, and OAuth 2.0“.
- I will choose the API key and then fill in the following:
- Parameter label that used when the user wants to make a connection.
- Parameter Name, while using the application they will put in information here to authenticate, so choose a meaningful name so that when the user connecting, they know that they will put an API key here, and the parameter name will be the header of the parameter itself in your API.
- Parameter Location, for example, ” in the header”.

Once you have an API with authenticated access, the next thing to do is to describe your API so that your power apps can communicate with your API.
- The Definition page of the custom connector gives you a lot of options for defining how your connector functions, and how it is exposed in your Apps.
- The definition page divided into actions, references, and policies. Here we will use Actions that mean what the actions or the operations the user will perform using this connector, for example here we will read the data using this connector so let’s add an action to get the information from our Cocktail DB.
- Click new actions, in the summary write a short description about what the connector does. In the description, write the description of your connector. And fill the operation id, here we will get the information of the cocktail from the API so I will set the operation id to be “getc”.

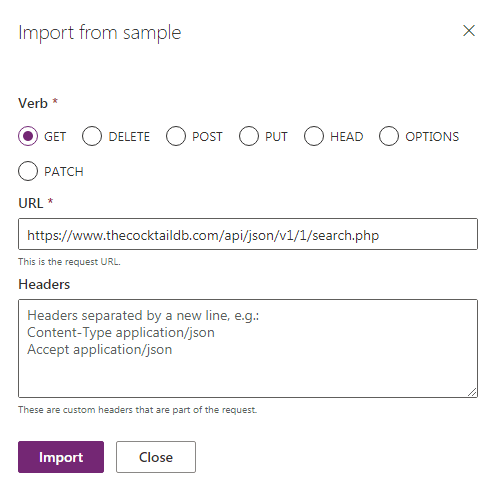
- Now, we need to define the request by clicking import from sample.

- In our case, we will use the verb GET to get info from the specified API.
- Put the request URL https://www.thecocktaildb.com/api/json/v1/1/search.php
- Then click import
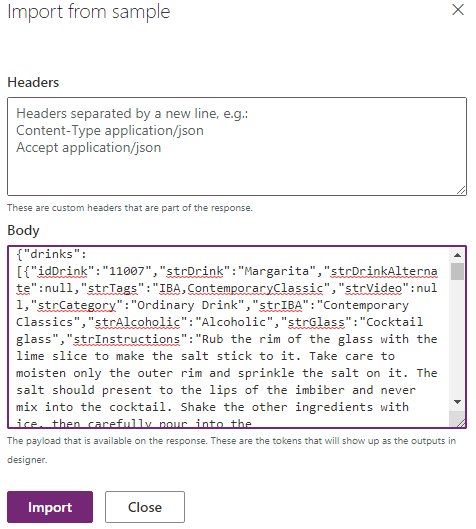
- Next, we need to define the response that displays information, based on the HTTP response that’s included in the API definition.

- Click add default response to import from a sample and put our sample, in my case from the URL “https://www.thecocktaildb.com/api/json/v1/1/search.php?s=margarita“.
- It gives us the sample, then copies and pastes it as shown below.
- As you see, the properties is loaded that found in the response.
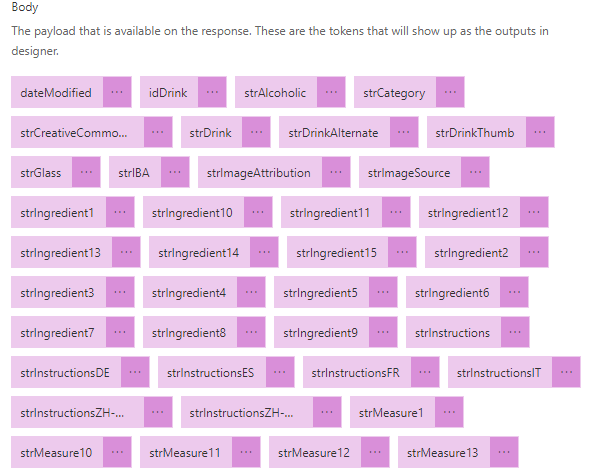
- The Validation area displays any issues that are detected in the API definition. Make sure to check this area before you save a connector.
- Then save and test the custom connector.
- Now you can use your PowerApps custom connector in your app, for example, make a canvas app.
- In the data source, just search for the name of our custom connector that we just created. It will ask for the API key that we have created in the security of the API.
Test API custom connector in Power Apps
To test the API custom connector in Power Apps, you can insert a gallery and in the items put this formula
Defaulttitle.getcocktail({s:"margarita"}).drinksGreat, the drinks from the database has been loaded successfully as shown below:
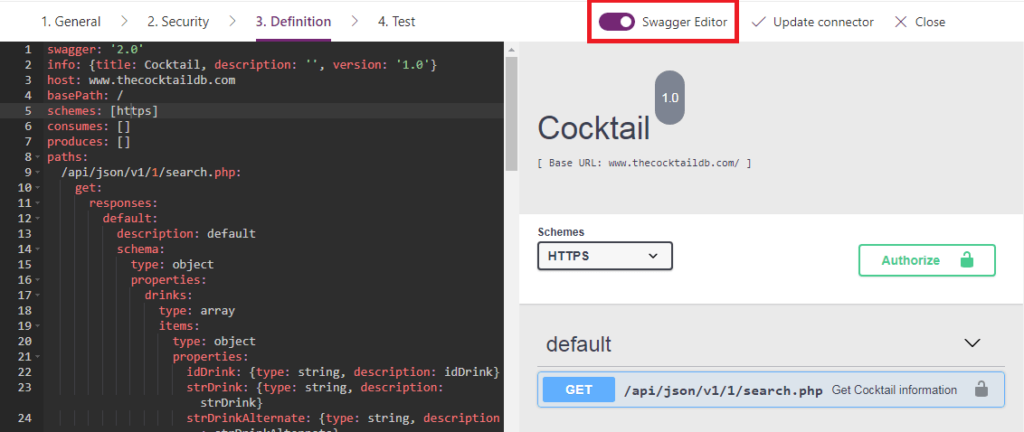
Note: if you get any error while returning the data from the response you can check Swagger edit and remove the errors.
Conclusion
Power Apps provide two types of connectors, which can be standard or premium connectors or PowerApps custom connectors.
In this post, we have covered the three types of PowerApps connectors and introduced a demo to create a custom connector to allow the use of APIs that aren’t covered by the public connectors.
